


Our Refurb Process: How We Restore Industrial & Label Printers to ‘Like-New’ Condition
1. Giving Industrial Printers a Second Life

Every industrial or label printer that reaches our workshop has a history. Some have worked tirelessly on busy production lines, others in warehouses or card-issuing environments. Over time, even the best-built machines accumulate dirt, wear, and mechanical fatigue. Our refurbishment process is designed to strip away years of use and return each printer to full working order — both inside and out.
At Infocus ID, refurbishment isn’t a quick clean-up; it’s a structured engineering procedure. Each unit is disassembled, inspected, cleaned, fitted with new parts where necessary, and subjected to comprehensive testing. The result is a printer that performs as reliably as when it first left the factory.
Choosing a refurbished printer offers clear advantages:
- Reduced cost compared with new equipment.
- A smaller environmental footprint by extending product life.
- Assurance of quality through professional testing and re-engineering.
By applying manufacturer-grade materials, ESD-safe tools, and trained technical expertise, we ensure every refurbished unit meets our standards for safety, performance, and appearance.
2. Arrival Condition & Initial Triage
Most printers arrive showing clear signs of service. They are often dirty, occasionally damaged, and may contain worn or missing components. Each printer begins its journey with a detailed intake inspection.
Our technicians record the model, serial number, and any visible faults. Photographs document its condition before work begins. This initial record helps us compare progress later and ensures nothing is overlooked.
At this stage, the unit remains unpowered. Loose parts, labels, and debris are removed manually. Where mechanical damage is visible, notes are made for part replacement. By methodically logging everything from scuffs on panels to missing screws, we create a clear refurbishment plan for each machine.
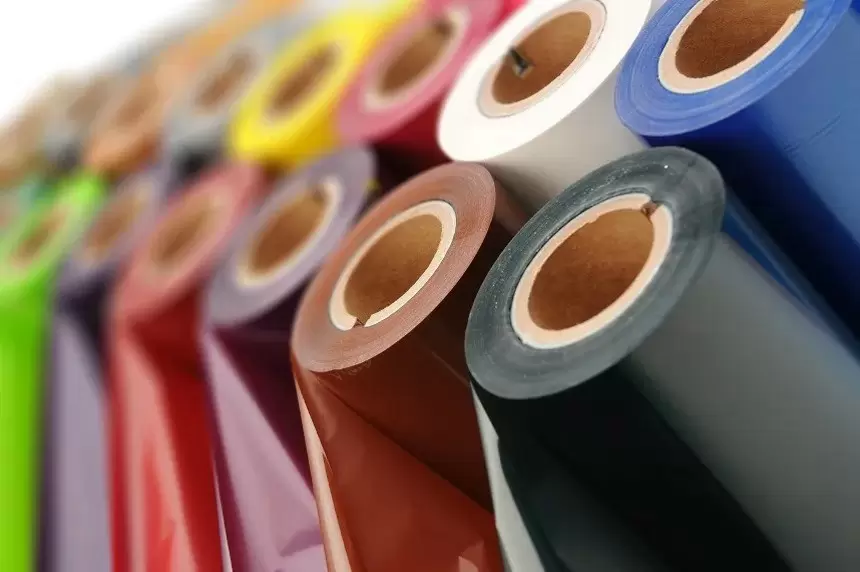
3. Label & Adhesive Removal — Special Care Required
Many industrial printers arrive covered in operational labels, barcodes, or warning stickers. While these are essential during service life, they present a challenge during restoration. Improper removal can scratch surfaces or damage plastics.
We use ESD-safe solvents and precision tools to lift adhesive layers carefully. The cleaning process targets stubborn residues while protecting paint finishes, polycarbonate displays, and electrical components. Surfaces are then wiped with lint-free cloths, leaving the chassis ready for deeper cleaning.
Proper label removal ensures the printer’s appearance is restored and prevents sticky residue from attracting further dust or dirt once in use again.
4. Baseline Test & Print Quality Assessment
Before dismantling, each printer undergoes an initial power-on test. This helps identify faults that may not be visible externally. Using test media and diagnostic software, technicians print sample labels or to gauge mechanical and print quality performance.
Typical issues at this stage include poor print density, faded output, and uneven alignment — all signs that the printhead is nearing the end of its life. In this example, the print quality was poor due to a number of blown elements and the printhead required replacement.
The results of these checks guide the remainder of the process. Error logs are captured, and all faults are documented before power is disconnected and the unit prepared for disassembly.
5. Strip-Down, Cleaning & Fault-Finding
Each printer is completely stripped into its primary assemblies: casing, chassis, roller mechanisms, drive units, and control boards. This full strip-down allows every component to be cleaned and inspected.
During this stage, technicians identified a damaged platen roller — a common issue that affects media feeding and print consistency. Worn or uneven rollers are replaced with genuine or approved equivalents to maintain quality.
All work is performed on ESD-safe benches. Internal dust, ink residue, and adhesive build-up are removed using antistatic brushes and cleaning fluids. The chassis and baseplate are thoroughly cleaned, exposing any hidden cracks or corrosion.
Once stripped, components are organised, labelled, and stored in trays ready for reassembly. This careful approach prevents cross-contamination between units and ensures the correct parts are refitted later.
6. Mechanical Overhaul — Belts, Rollers, Cogs
Mechanical reliability is at the heart of every printer. We inspect all drive components for wear and damage. In one case, the main drive belt showed missing teeth and frayed edges. The belt was removed, and all related cogs were checked for alignment and smooth rotation.
The following table illustrates typical mechanical checks during refurbishment:
| Component | Common Issue | Corrective Action |
|---|---|---|
| Drive belt | Worn teeth or fraying | Replace and tension to specification |
| Platen roller | Surface wear or cracks | Replace with OEM-grade part |
| Gears & cogs | Misalignment or debris | Clean, lubricate, and re-seat |
| Bearings | Noise or rough motion | Replace if out of tolerance |
| Springs & levers | Loss of tension | Adjust or replace as needed |
After cleaning and inspection, new components are installed. In this case, a new drive belt was fitted and tensioned correctly, restoring smooth motion. This careful mechanical restoration ensures the printer can withstand heavy-duty use once returned to service.
5. Strip-Down, Cleaning & Fault-Finding
Each printer is completely stripped into its primary assemblies: casing, chassis, roller mechanisms, drive units, and control boards. This full strip-down allows every component to be cleaned and inspected.
During this stage, technicians identified a damaged platen roller — a common issue that affects media feeding and print consistency. Worn or uneven rollers are replaced with genuine or approved equivalents to maintain quality.
All work is performed on ESD-safe benches. Internal dust, ink residue, and adhesive build-up are removed using antistatic brushes and cleaning fluids. The chassis and baseplate are thoroughly cleaned, exposing any hidden cracks or corrosion.
Once stripped, components are organised, labelled, and stored in trays ready for reassembly. This careful approach prevents cross-contamination between units and ensures the correct parts are refitted later.
7. Internal Cleaning — Preparing for Rebuild
Once mechanical faults are resolved, the internal framework is cleaned thoroughly using ESD-safe materials. Fine dust and residue can cause static discharge or premature wear, so every accessible surface is cleaned and vacuumed.
After cleaning, the difference is dramatic — inside surfaces appear almost new. Internal fans and vents are checked for airflow, and power supplies are cleaned to remove conductive dust. This ensures proper cooling and stable electrical operation.
Technicians document the cleaned interior before moving on to label-safe chemical treatment.
8. Old Label Removal Using Chemical Treatment
Some printers retain old operational or compliance labels that are strongly bonded to plastic or metal parts. These are treated with specialist cleaning agents that break down adhesives without softening plastics or damaging electrical components.
This controlled process prevents chemical runoff into sensitive areas such as boards or wiring looms. After treatment, surfaces are rinsed with isopropyl-based cleaners and left to dry before reassembly. The result is a clean, neutral surface suitable for new safety and identification labels.
9. Platen Roller Replacement & Media Path Care
A smooth platen roller is vital for accurate media feeding. After cleaning, the damaged roller identified earlier is replaced with a new one. Media paths are cleaned, and sensors are checked to ensure consistent alignment.
This stage removes any trapped dust, adhesive, or label fragments that could affect print registration. Once complete, the mechanical section of the printer is effectively as new and ready for electrical testing.
10. Subsystem Tests Before Reassembly
Before the external case is refitted, the printer is powered for a full system check. The following components are verified:
- LCD and control panel functions.
- Stepper and drive motors.
- Media sensors and calibration routines.
- USB and network port connectivity.
- Additional options such as cutters or rewinders (if fitted).
Each subsystem is exercised to ensure reliable operation. Diagnostics confirm communication across all ports. Any firmware faults are corrected, and mechanical timing is checked once more before final assembly begins.
This interim test avoids the need to reopen the unit later and ensures that all core features are fully functional.
11. Exterior Restoration & Cosmetic Refinishing
Attention then turns to appearance. Exterior panels are professionally cleaned, and where required, door and side panels are powder-coated to restore a factory finish. If required, the printhead is replaced during this stage, ensuring fresh imaging quality.
Every screw, hinge, and latch is inspected. Final quality control checks confirm that panels close properly and all fasteners are secure.
This cosmetic restoration not only improves presentation but also protects the underlying metalwork against corrosion, extending the printer’s usable life.
12. Final Print Tests — Direct Thermal & Thermal Transfer
The fully assembled printer undergoes a final functional assessment. It is tested using both direct thermal and thermal transfer methods. These modes verify temperature calibration, ribbon feed, and pressure settings.
Print quality is compared against reference samples. The finished output matches factory expectations, with clear text, sharp graphics, and even density across the media. Each unit must pass these tests before it can be approved for sale or returned to the customer.
13. Whitening Sun-Bleached Plastics
Over time, plastic housings can become sun-bleached or yellowed. Where necessary, we restore these surfaces using a controlled combination of chemical, heat, and light treatment.
An example is an older Pebble card printer whose case was discoloured from UV exposure. After treatment, the plastic returned to its original shade, dramatically improving its appearance.
The process rejuvenates the plastic without affecting its strength, helping every refurbished unit look as good as it performs.
14. Sustainability & Customer Assurance
Refurbishment is more than engineering — it’s a commitment to sustainability. Every printer we restore represents fewer raw materials extracted and less electronic waste produced.
Infocus ID refurbished printers include full functional testing and warranty coverage, giving customers confidence in long-term reliability. Extending the lifespan of equipment contributes to both environmental responsibility and operational efficiency.
Customers can also return their existing printers for assessment or trade-in, ensuring components continue to be reused wherever possible.
15. Conclusion — Built to Perform Again
From the first inspection to the final test print, our refurbishment process combines precision, experience, and care. By replacing worn parts, restoring surfaces, and verifying performance at every step, we return each printer to a standard worthy of its original manufacture.
Infocus ID’s goal is simple: deliver printers that perform as well as the day they first left the factory — ready to serve reliably for years to come.
Get in touch today to learn how Infocus ID can bring your industrial printer back to peak performance.